
Waterproofing Before Painting (India 2026): The Right Order to Paint a Damp Wall
Painting over damp is the costliest home mistake. The correct sequence — fix source, dry, seal, prime, paint — plus damp-proof paint vs real waterproofing, explained.
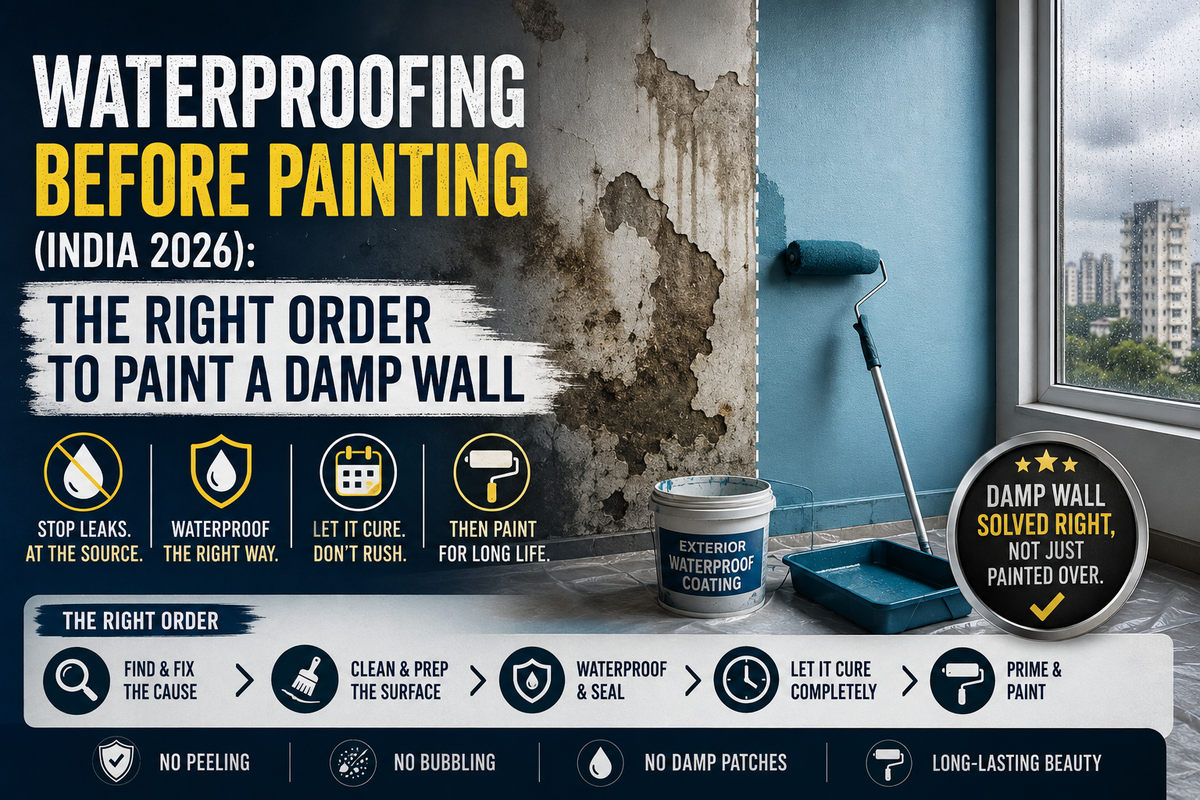
Yes — always waterproof before painting if a wall shows any damp, staining or peeling. The correct order is: fix the source of the damp, let the wall dry fully (days to weeks, confirmed with a moisture meter), seal or waterproof the surface, apply a moisture-resistant primer, then paint two coats. Painting over a damp wall traps moisture, so the paint blisters and peels within weeks to months. "Damp-proof paint" alone is not a fix — if the wall is still wet underneath or the source isn't stopped, it simply lifts off.
Waterproofing must come before painting whenever a wall shows damp, stains, efflorescence or peeling. Painting over a damp wall is one of the most common and expensive homeowner mistakes: trapped moisture breaks the paint-to-wall bond, causing blistering and peeling within weeks or months, and salts (efflorescence) push through the surface. The correct sequence is: (1) identify and fix the source — rising damp, external seepage, or a leak; (2) let the wall dry fully, confirmed with a moisture meter; (3) seal with a waterproofing primer, damp-proof coating, or crystalline compound for active damp; (4) apply a moisture-resistant primer; (5) paint two coats of quality emulsion. Damp-proof paint is not a substitute for treating the source — on a still-wet substrate it lifts off. This is what decides whether a paint job lasts one year or ten. The best window in most of India is the dry pre-monsoon months (roughly February–May).
The Mistake That Costs The Most
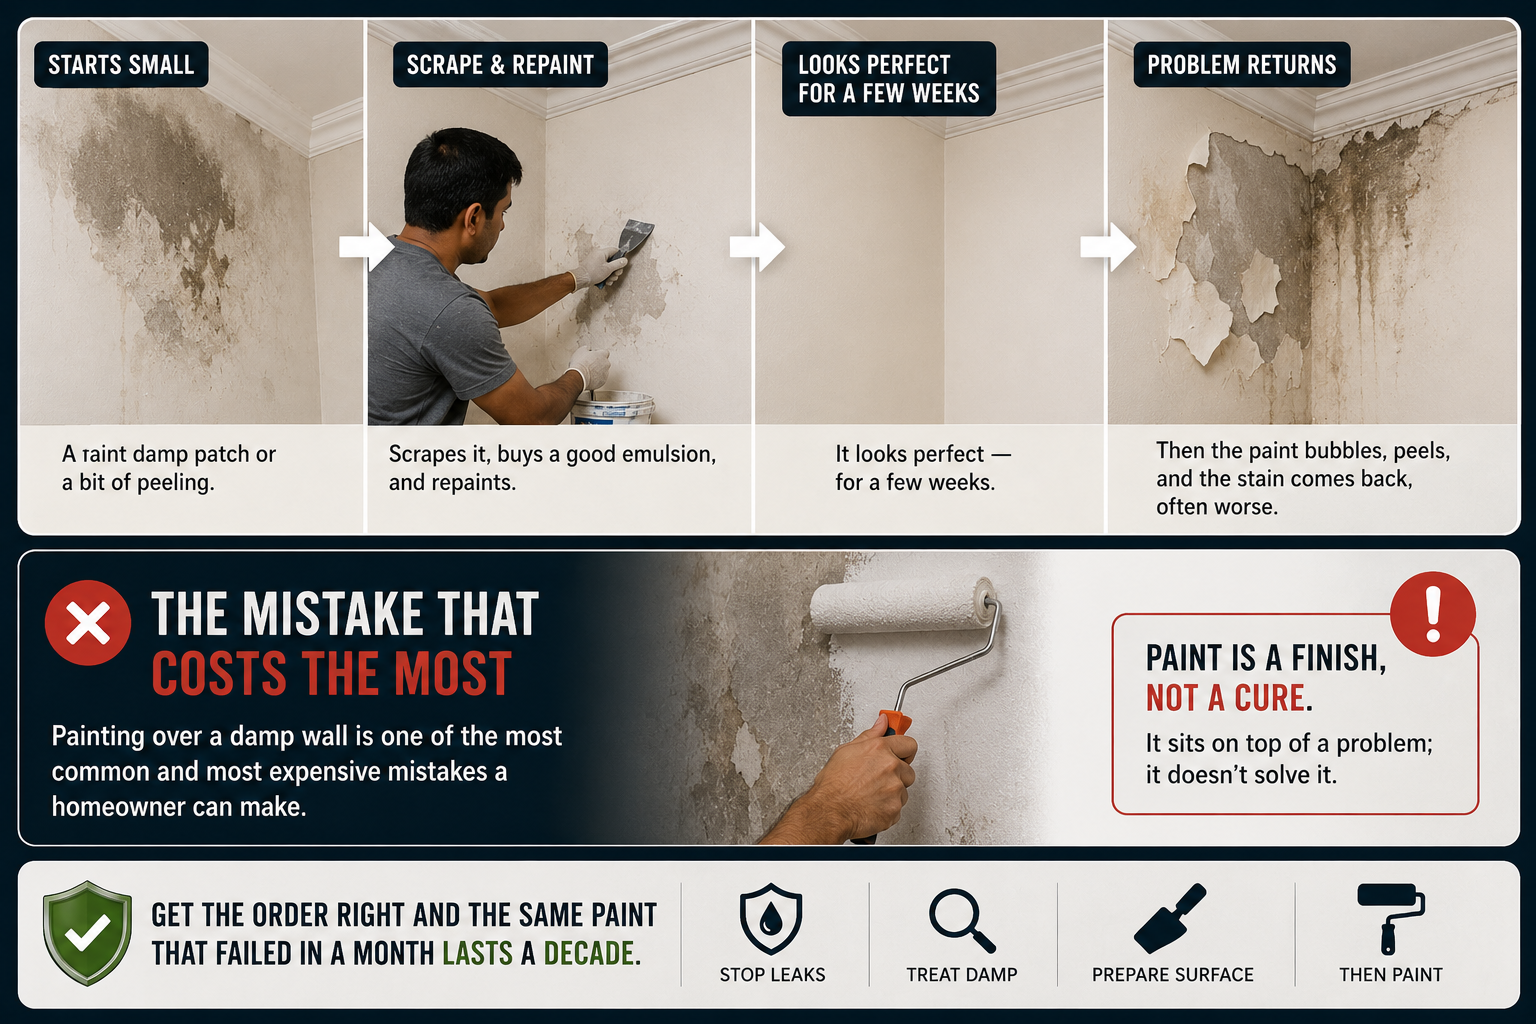
Here's a scene that plays out in lakhs of Indian homes every year: a wall has a faint damp patch or a bit of peeling near the ceiling. Someone scrapes it, buys a good emulsion, and repaints. It looks perfect — for a few weeks. Then the paint bubbles, peels, and the stain comes back, often worse.
Painting over a damp wall is one of the most common and most expensive mistakes a homeowner can make. And it's entirely avoidable once you understand one thing: paint is a finish, not a cure. It sits on top of a problem; it doesn't solve it. Get the order right and the same paint that failed in a month lasts a decade.
Why Painting Over Damp Fails
When you paint a wall that still holds moisture, three things happen:
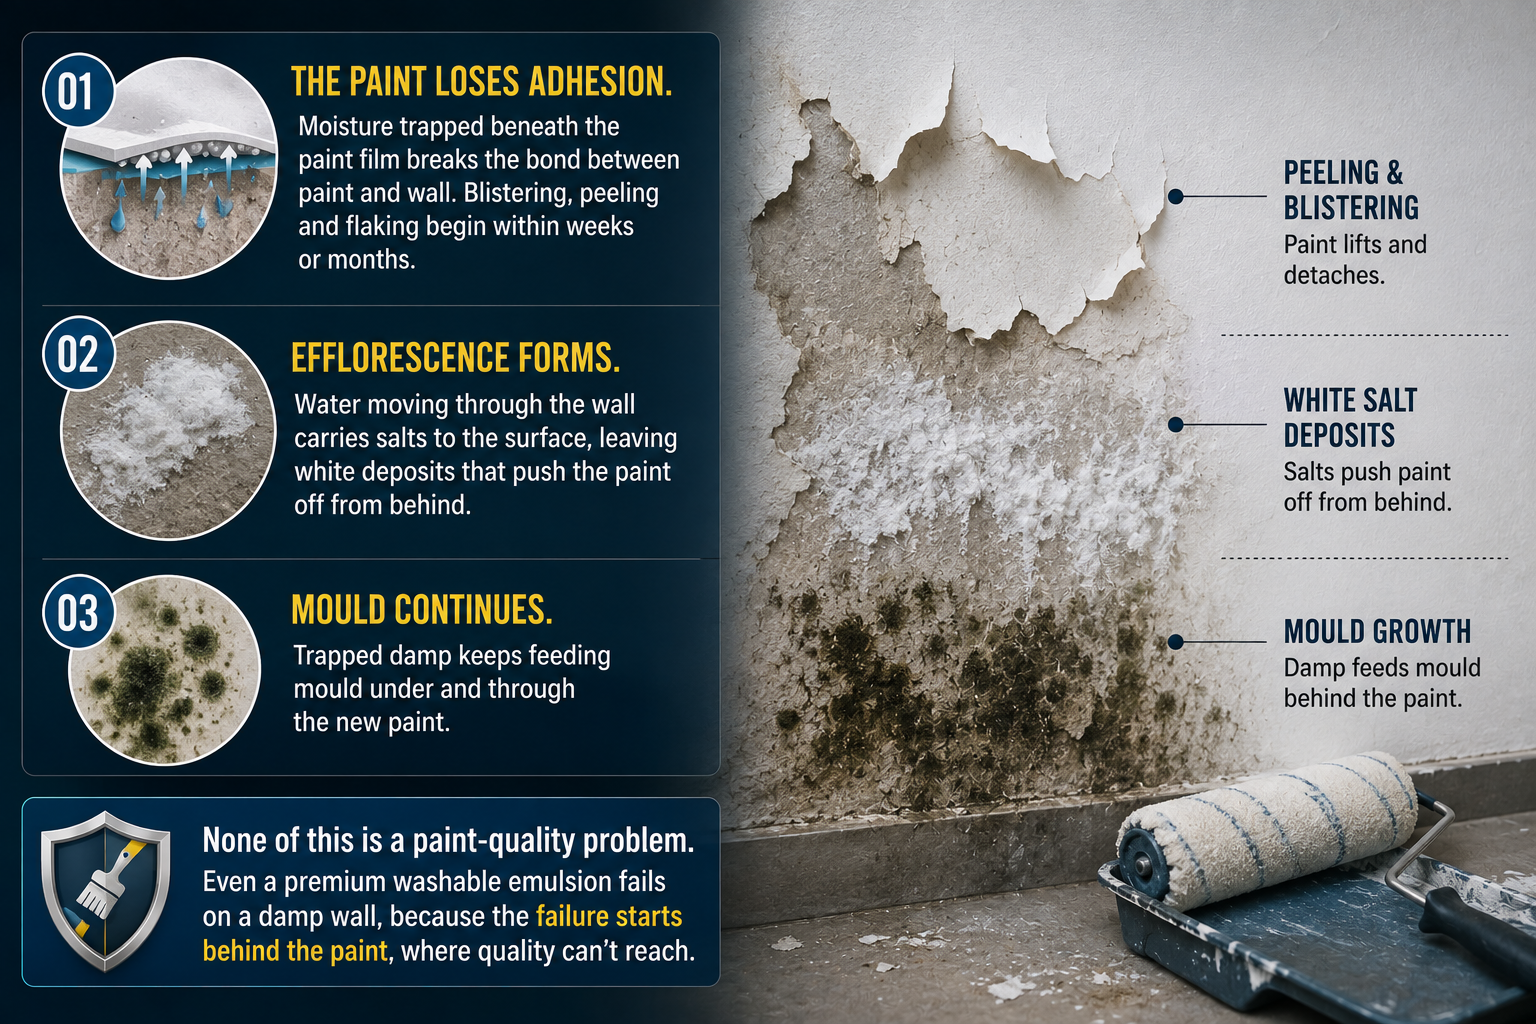
- The paint loses adhesion. Moisture trapped beneath the paint film breaks the bond between paint and wall. Blistering, peeling and flaking begin within weeks or months.
- Efflorescence forms. Water moving through the wall carries salts to the surface, leaving white deposits that push the paint off from behind.
- Mould continues. Trapped damp keeps feeding mould under and through the new paint.
None of this is a paint-quality problem. Even a premium washable emulsion fails on a damp wall, because the failure starts behind the paint, where quality can't reach.
The Correct Sequence (Fix → Dry → Seal → Prime → Paint)
This five-step order is the whole game. Skip or rush any step and you're back to peeling paint.
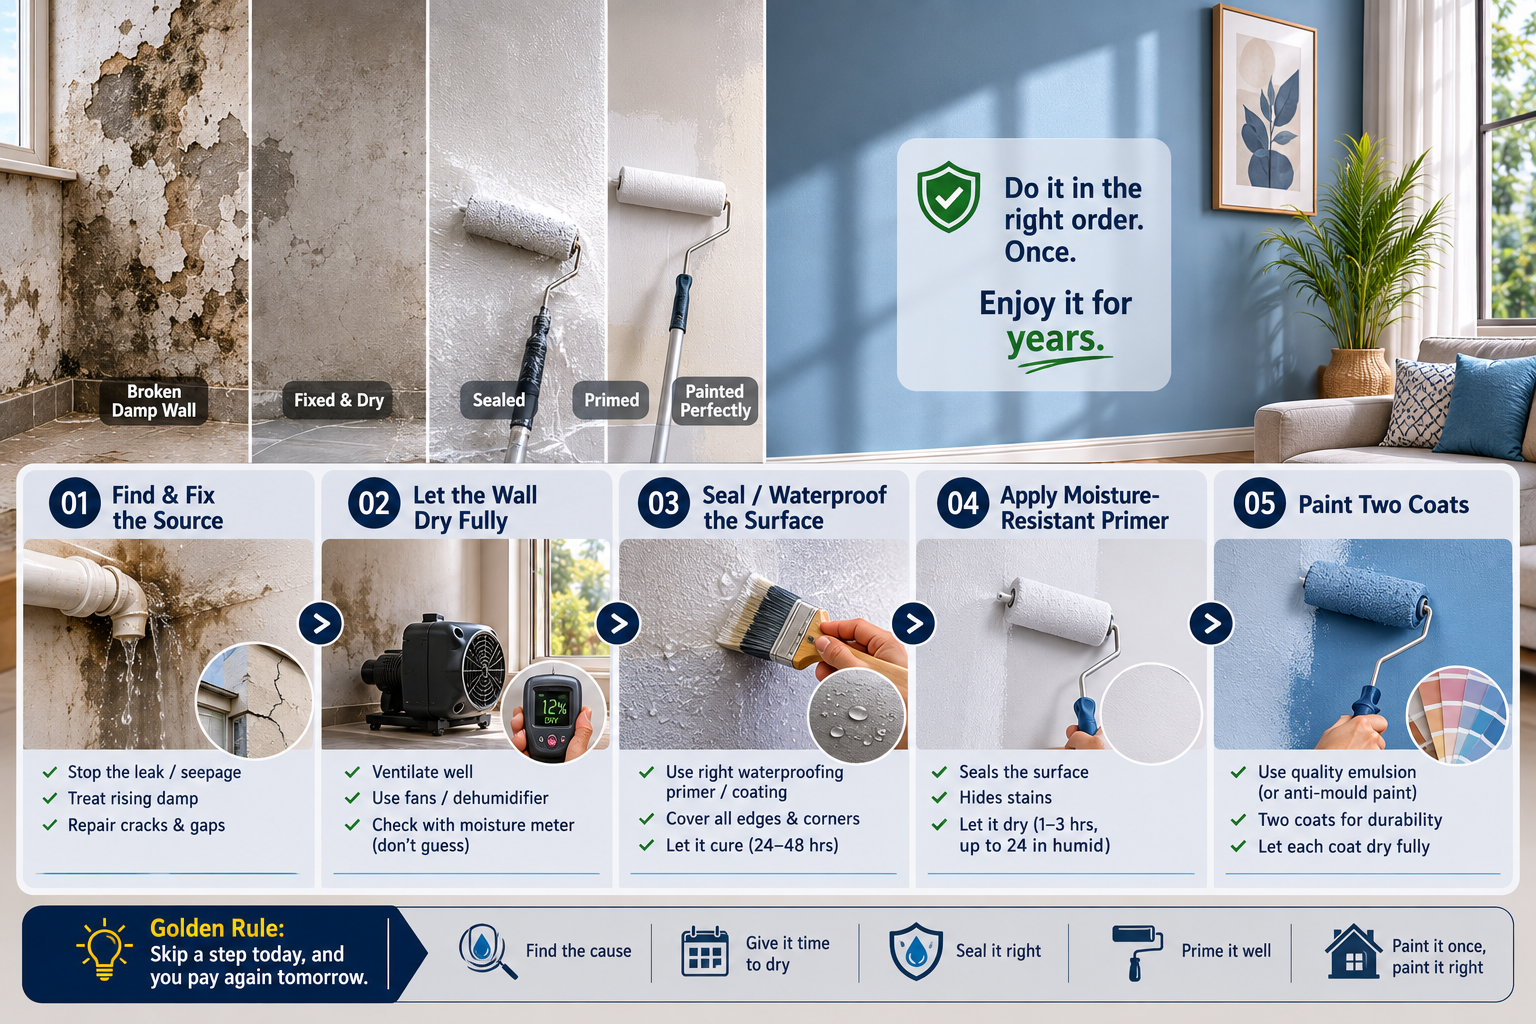
Step 1 — Find and fix the source. This is the step people skip, and it's the most important. Damp comes from somewhere: rising damp (ground moisture climbing a wall without a damp-proof course), external seepage (rain through cracks or porous plaster), or a leak (terrace or plumbing). Treating the surface without stopping the source guarantees repeat failure. See signs of water damage to identify it and exterior wall seepage for the fix.
Step 2 — Let the wall dry fully. Once the source is controlled, the wall must dry — this can take days to weeks depending on how wet it was. Speed it with ventilation (open windows, fans, a dehumidifier), but avoid direct heat, which dries too fast and cracks the surface. Confirm dryness with a moisture meter rather than guessing; a wall can feel dry and still hold moisture inside. A useful field check: after fixing, give it a week and look for any wet patches returning.
Step 3 — Seal / waterproof the surface. On a dry wall, apply the right treatment: a waterproofing primer or damp-proof coating for general protection, or a crystalline waterproofing compound for walls that are still prone to damp. For severe water ingress, a tanking slurry acts as a full waterproof barrier. Cover edges, corners and previously-wet areas thoroughly, and let it cure (often 24–48 hours).
Step 4 — Apply a moisture-resistant primer. Primer seals the surface, hides residual stains, and gives the topcoat something to grip. Let it dry per the label — generally 1–3 hours, up to 24 in humid conditions. Painting before the primer is fully dry causes the very peeling you're trying to avoid.
Step 5 — Paint two coats. Finish with a quality moisture-resistant emulsion (or an anti-mould paint for problem areas), letting each coat dry fully. Two coats give an even, durable finish.
Damp-proof Paint Vs Real Waterproofing
This is where homeowners get misled, so here's the honest distinction:
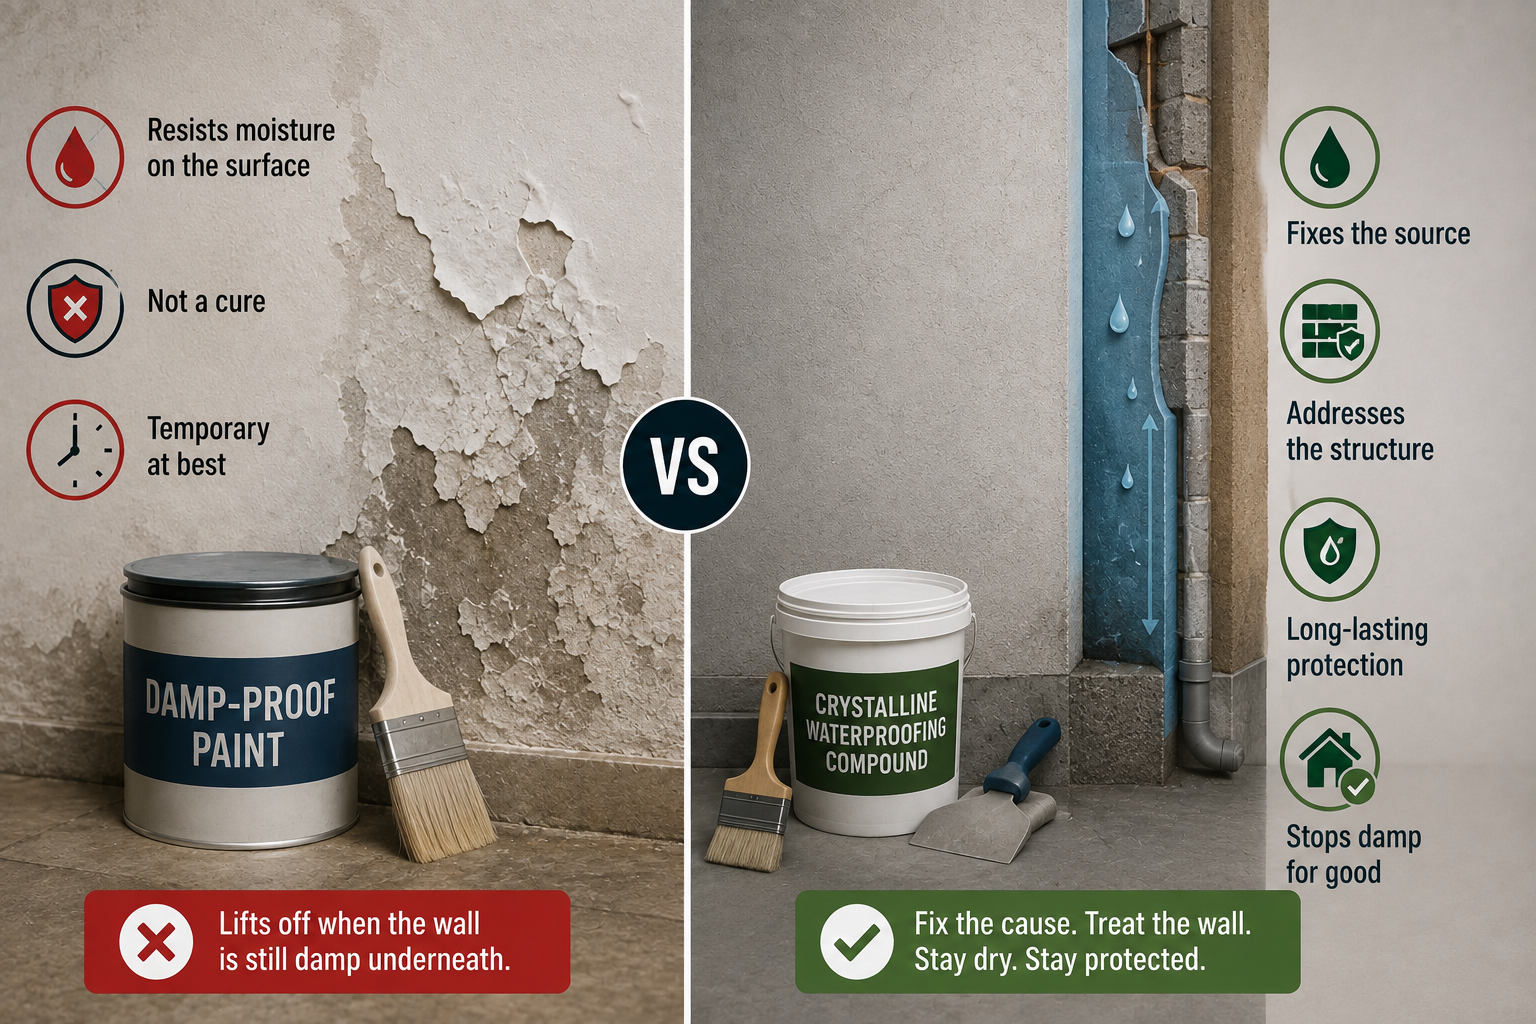
"Damp-proof paint" / waterproofing paint is a coating that resists moisture on the surface. It has a place — as a primer-like sealer on a dry wall after the source is fixed, or to make a room look good quickly. But it is not a cure. As tradespeople bluntly put it, damp-proof paint is "temporary at best" if the substrate is still wet — it simply lifts off, because no coating holds on a wall that's wet underneath.
Real waterproofing addresses the source and the structure — fixing the leak, treating rising damp with a DPC or crystalline compound, sealing the exterior. This is what actually stops the damp.
The rule: damp-proof paint is a finishing aid on an already-fixed, dry wall — never a shortcut that lets you skip fixing the source. If someone sells you "just use waterproof paint" on an actively damp wall, that's the snake-oil version.
Timing: When To Do This
The best window for waterproofing-and-painting in most of India is the dry pre-monsoon months (roughly February–May). Walls dry properly, coatings cure correctly, and you get protection in place before the rains test it. Doing this work during or right after monsoon is fighting the weather — surfaces won't dry, and painting over lingering damp restarts the whole failure cycle.
If you're planning a repaint for the festive season, this is why the sequence matters: treat and dry now, paint when the wall is ready — not the other way round. For full painting cost and process, see the House Painting Guide; for the waterproofing methods behind Step 3, see the Home Waterproofing Guide.
Key Takeaways
- Always waterproof before painting any wall with damp, stains or peeling.
- Painting over damp fails within weeks to months — trapped moisture breaks the bond.
- Correct order: fix source → dry fully → seal → prime → paint two coats.
- Confirm dryness with a moisture meter — a wall can feel dry but hold moisture.
- Damp-proof paint is not a cure — on a wet substrate it just lifts off.
- Real waterproofing fixes the source; paint is only the finish.
- Best window: dry pre-monsoon months (~Feb–May) for proper drying and curing.
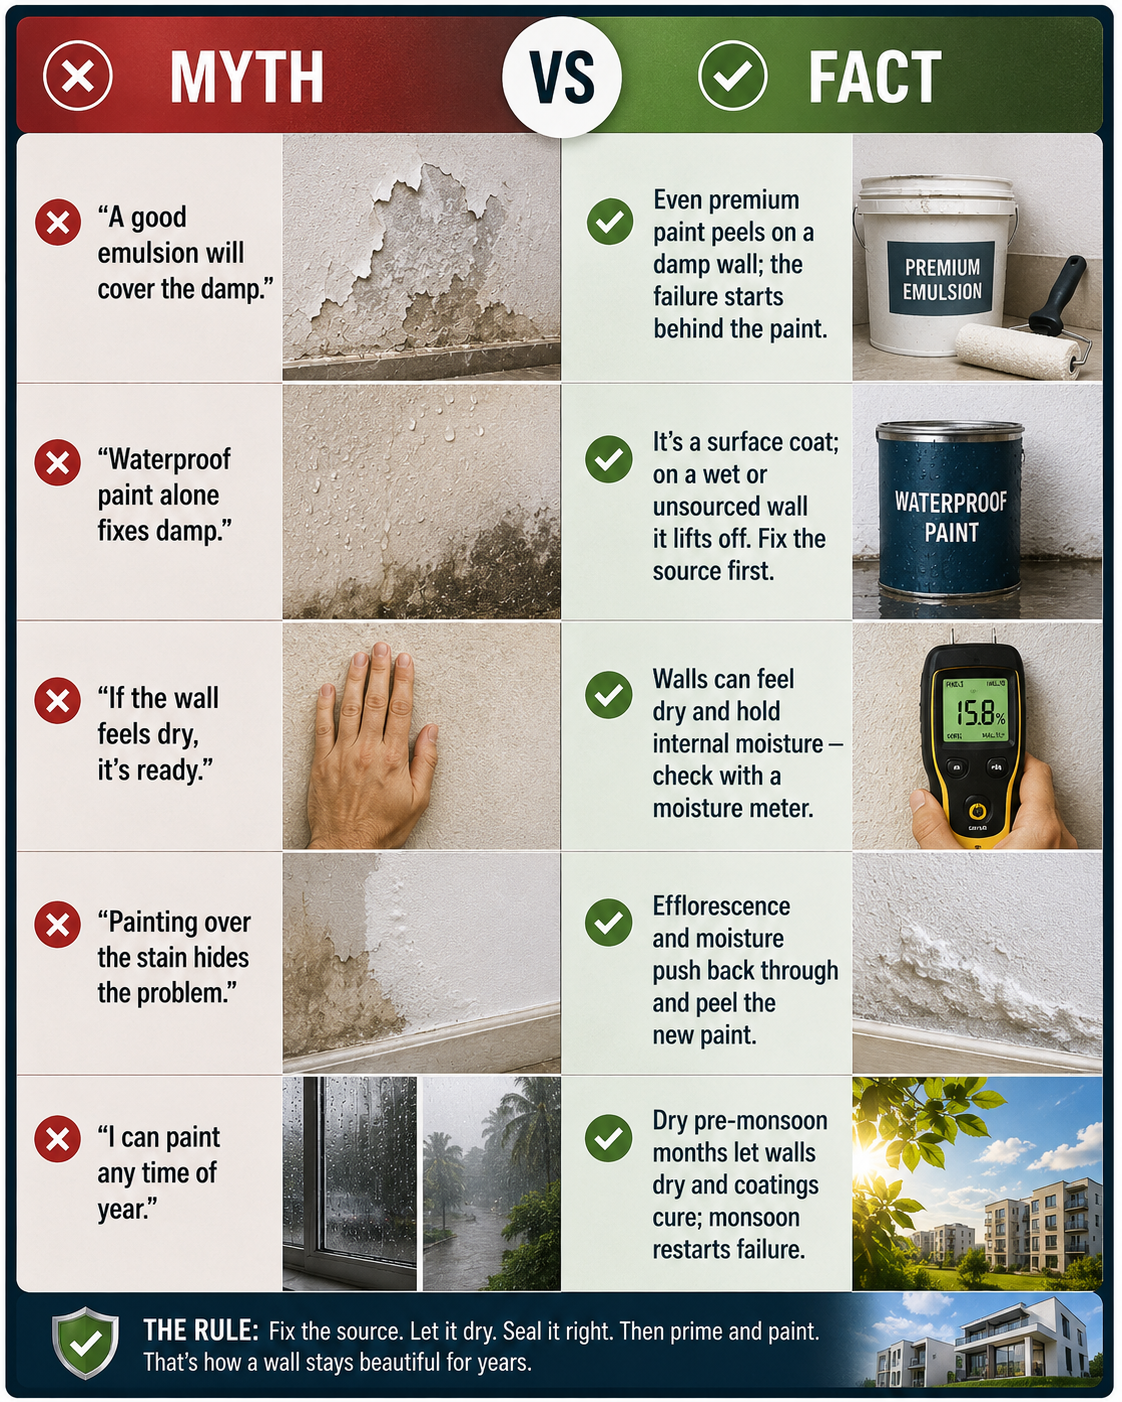
Myth Vs Fact
| Myth | Fact |
|---|---|
| "A good emulsion will cover the damp." | Even premium paint peels on a damp wall; the failure starts behind the paint. |
| "Waterproof paint alone fixes damp." | It's a surface coat; on a wet or unsourced wall it lifts off. Fix the source first. |
| "If the wall feels dry, it's ready." | Walls can feel dry and hold internal moisture — check with a moisture meter. |
| "Painting over the stain hides the problem." | Efflorescence and moisture push back through and peel the new paint. |
| "I can paint any time of year." | Dry pre-monsoon months let walls dry and coatings cure; monsoon restarts failure. |
Common Mistakes
- Painting over a damp wall without fixing the source.
- Not waiting for the wall to dry fully (skipping the moisture-meter check).
- Treating "damp-proof paint" as a cure instead of a finishing aid.
- Using direct heat to dry walls fast, cracking the surface.
- Painting before the primer is fully dry.
- Doing the work during or right after monsoon.
- Sealing the surface but leaving a terrace or plumbing leak feeding it.

Comments ()