
The Ultimate Guide to Installing Your Own Ceramic Tile Backsplash
Start your DIY ceramic tile backsplash project to beautify your kitchen or bathroom. Our guide helps beginners and pros achieve a pro finish.
Embarking on a DIY project to install a ceramic tile backsplash can transform the look of your kitchen or bathroom with a touch of personal flair. Whether you're a novice looking to undertake your first DIY tiling project or an experienced DIYer aiming for a professional finish, this guide covers all the bases. Get ready to enhance the beauty and functionality of your space with a new ceramic tile backsplash that you can be proud of. Continue reading, learn more, and get ready to upgrade your kitchen or bathroom!
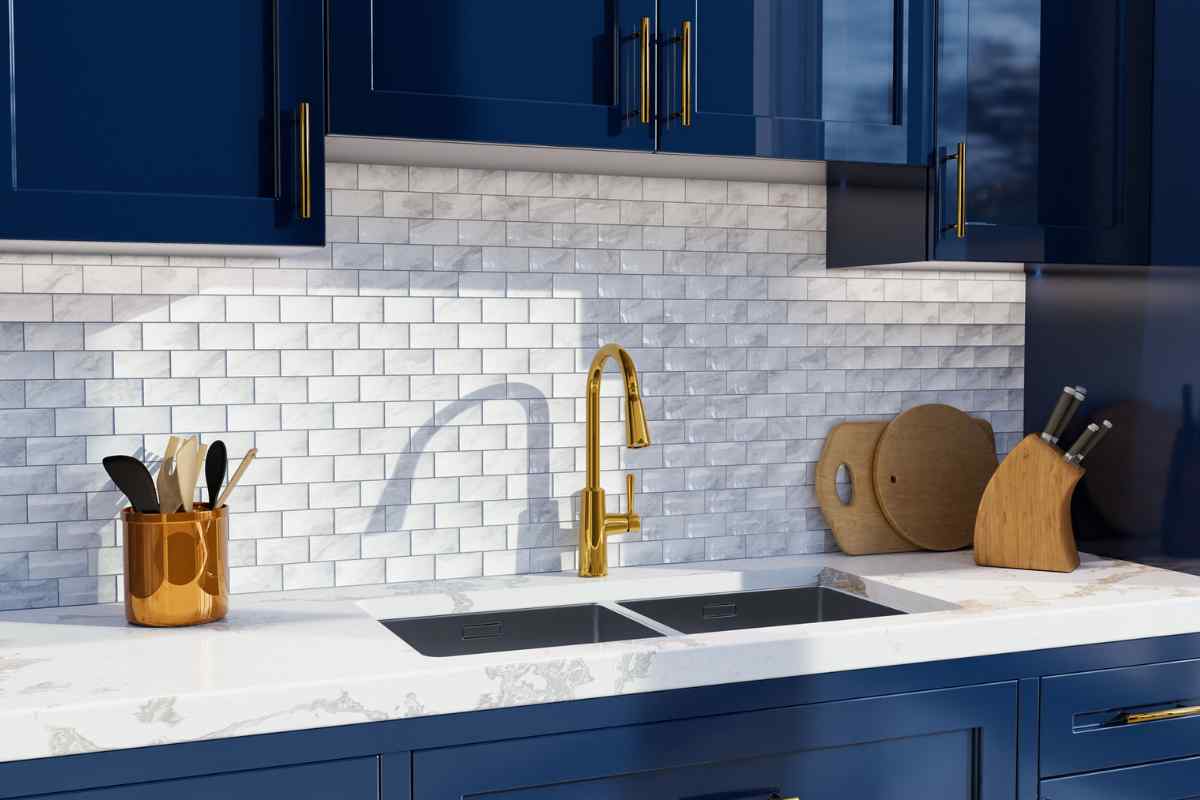
Why ceramic tiles for backsplash?
Are you remodeling your kitchen or looking for backsplash bathroom ideas. Installing a ceramic tile backsplash would be a great idea. But before going into details, it's essential to discuss why ceramic tiles make great backsplash material. Here are some convincing reasons:
- Durability: Ceramic tiles are known for their durability and resistance to wear and tear. They're complex, don't scratch easily, and can withstand moisture, making them ideal for kitchens and bathrooms.
- Ease of maintenance: Ceramic is quite easy to clean. Spills and splashes can be wiped away without much effort, and the tiles resist stains, which helps maintain their appearance over time. So, ceramic tiles are particularly beneficial behind a stove or sink where daily splashes occur.
- Various designs: Ceramic tiles come in multiple colors, patterns, and sizes. This variety allows homeowners to choose tiles that match their style and the room's overall design. Whether you prefer a modern, sleek look or a more traditional style, ceramic tiles will likely fit.
- Cost-effective: Compared to other materials like glass, stone, or metal, ceramic tiles are more affordable, making them a budget-friendly option without sacrificing style or quality.
- Heat resistance: Ceramic tiles can withstand high temperatures, an essential feature for a kitchen backsplash where heat from the stove is a constant factor.
- Environmental impact: Ceramic tiles are often made from natural clay and other raw materials, and they can be recycled, making them a more environmentally friendly option for homeowners concerned about their ecological footprint.
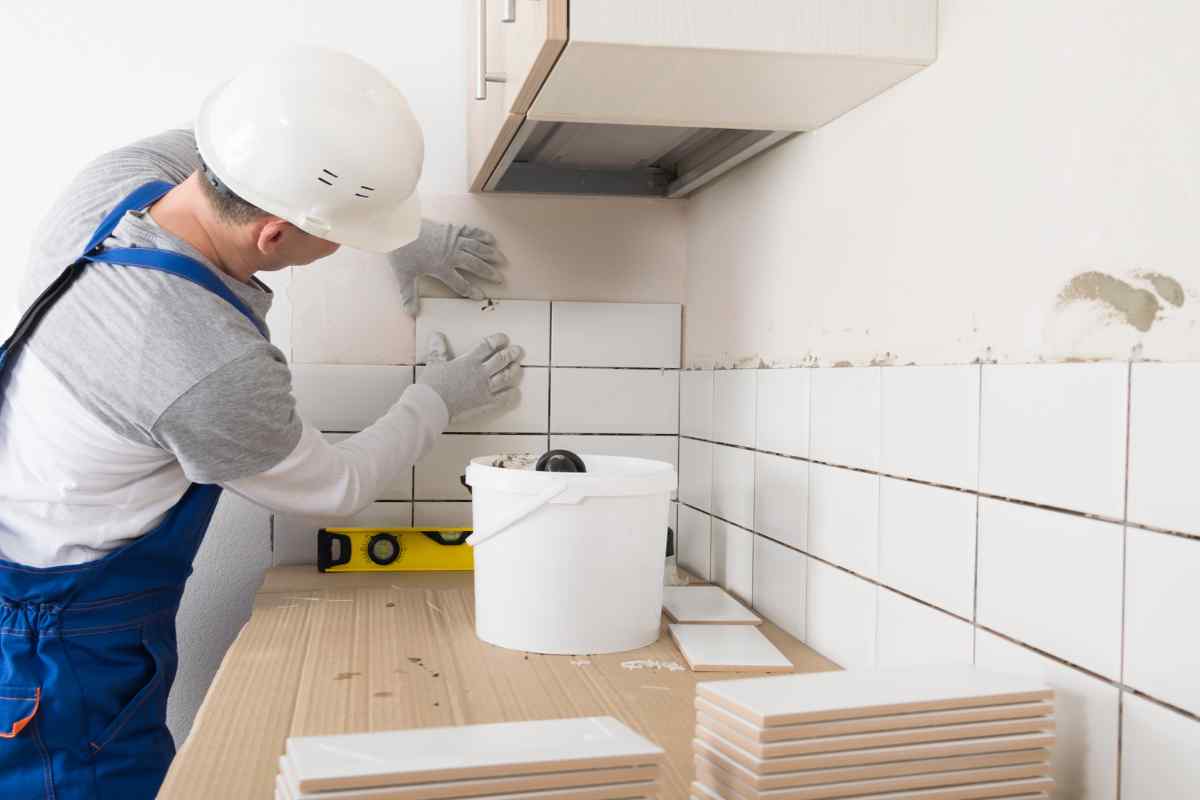
- Installation: Installing ceramic tiles can be a DIY project, though professional installation is also a great option as it ensures perfect alignment and a finished look. The process includes applying tiles with adhesive, grouting between the tiles, and sealing if necessary. These features make ceramic an excellent choice for a backsplash in spaces requiring functionality and aesthetic appeal.
Preparing the workspace
Installing a ceramic backsplash can significantly enhance the look of your kitchen or bathroom. Preparing the workspace correctly is crucial for a successful installation. Here's how to get everything ready:
Clear the area
Remove any appliances, furniture, or fixtures that might hinder your access to the backsplash area. This includes removing outlet covers, switch plates, and other wall fittings. Cover your countertops and floors with a drop cloth to protect them from debris and spills.
Clean the wall surface
Ensure the wall where you install the ceramic tiles is clean and free from dust, grease, or old adhesive residue. Use a degreaser or a mixture of warm water and mild detergent to clean the walls thoroughly. Allow the wall to dry completely.
Repair any damage
Check the wall for any holes, cracks, or imperfections. Fill any holes or cracks with spackling compound and smooth the area once it dries. This step is essential to ensure a flat and stable surface for your tiles.
Measure and mark your layout
Measure the area where the backsplash will be installed to determine how many tiles are needed and how they'll fit. Use a level and a chalk line to mark guidelines on the wall to keep your tile alignment straight. This is especially important if you're doing a pattern or design.
Prepare your materials
Have all your materials and tools ready. These include:
- Ceramic tiles
- Tile adhesive or thin-set mortar
- Tile spacers
- Notched trowel
- Grout (sanded or unsanded depending on tile spacing)
- Grout float
- Wet tile saw or tile cutter
- Level
- Sponge and bucket for cleaning
- Safety glasses and gloves
Measure your space carefully to purchase the correct amount of tiles and materials. Also, note that ceramic tiles come in an array of colors, shapes, and sizes. Consider the overall design of your kitchen and the level of maintenance you're willing to commit to. Smaller tiles can offer more intricate designs but may require more grout maintenance.
Mix the adhesive
If using a thin-set mortar, follow the manufacturer's instructions to mix it properly. It should have a peanut butter-like consistency. If you use a pre-mixed adhesive, ensure it's stirred well and ready to use.
Dry layout
Before applying any adhesive, dry-layout the tiles directly on the workspace. This step helps you visualize the look and make any necessary adjustments to tile placement without the pressure of adhering them immediately. Following these steps, you can create a well-prepared workspace that leads to a smoother installation process and a beautifully finished ceramic backsplash.
Sealing the ceramic backsplash
Sealing a ceramic tile backsplash, particularly the grout, is critical to ensure it stays moisture-resistant and stain-free. Here's how you can properly seal your backsplash:
Choose the right sealer
Select a sealer based on the type of tiles and grout you have. Most grout is porous and requires sealing to protect against moisture and staining. Choose a penetrating sealer for the best results. Meanwhile, glazed ceramic tiles usually don't need sealing, but unglazed tiles do.
Prepare the area
Before sealing, ensure that the tiles and grout are spotless. Any dirt, grease, or residue can affect the adhesion and effectiveness of the sealer. Use a mild cleaning solution and rinse the area thoroughly with water. Allow the backsplash to dry completely, as applying sealer to damp surfaces can trap moisture.
Repair damaged grout
If the grout has cracks or missing pieces, repair them before sealing. Then, apply new grout as needed, following the manufacturer's instructions. The new grout must cure fully before applying a sealer, typically for about 48 to 72 hours.
Apply the sealer
You can use a small foam brush, a grout sealer applicator, or a spray bottle designed for grout sealing. Your chosen tool depends on the area size and your comfort level. Start at one end of the backsplash using the applicator and work in small sections. Apply the sealer directly to the grout lines. Avoid overapplying; the grout should be wet but not pool with sealer. If the sealer gets on the tile surface, quickly wipe it off with a clean, dry cloth. Allow the sealer to dry according to the manufacturer's recommended time, usually a few hours. Avoid using the area during this time. Depending on the product and the level of protection needed, a second coat may be beneficial. Check the manufacturer's recommendation.
After the final application, the sealer must cure for 24 to 48 hours before the area encounters heavy use or moisture. Once the sealer has cured, test its effectiveness by dripping water on the grout. The water should bead up on the surface. If it soaks in, additional sealing may be necessary. Sealing your backsplash extends its life and maintains its appearance, making cleaning easier and protecting against stains and water damage. Regularly check and reseal to keep your ceramic backsplash in the best condition.
Maintaining the backsplash
Maintaining a ceramic backsplash is relatively straightforward and will help preserve its appearance and longevity. Here are critical steps to keeping your ceramic backsplash clean and in excellent condition, grouped into three categories: daily maintenance, deep cleaning, and preventative care.
Daily maintenance
To prevent stains, especially on grout, clean up any spills as soon as they occur. Use a damp cloth or sponge to wipe away food splatters and liquid spills. Meanwhile, use a soft cloth or sponge with warm water and a gentle detergent for daily or weekly cleaning. This will remove most kitchen grease and grime from the tiles.
Deep cleaning
The grout between tiles can collect dirt and become discolored over time. Use a grout cleaner or paste baking soda and water, apply it to the grout lines, and scrub with a small brush, like an old toothbrush. Rinse thoroughly with warm water when done. For tougher stains on ceramic tiles, you can use vinegar and water (mix half and half). Spray or apply it on the stains, let it sit for a few minutes, then scrub gently with a non-abrasive pad or brush and rinse off. Avoid using vinegar on the grout, as it can erode over time.
Preventative care
Never use harsh scrubbing tools or abrasive cleaners on ceramic tiles, as they can scratch the surface. Stick to non-abrasive materials and gentle cleaners. Another essential step in preventative care is protecting the surface. When doing activities that might scratch or damage the tiles, like moving heavy kitchen equipment, be cautious and consider laying down a protective cloth. In addition to the above, you must also regularly check the grout seal. Check the condition of the grout sealant periodically. If water starts to penetrate the grout rather than bead on the surface, it's time to reapply a grout sealer to keep the grout waterproof and easier to clean. Following these maintenance steps, your ceramic backsplash will remain functional and visually appealing, making it a lasting part of your kitchen's decor.
Conclusion
Installing a ceramic tile backsplash is a doable DIY project that can transform the look of your kitchen or bathroom. By following these steps and taking your time to plan and prepare, you'll be able to create a beautiful and durable backsplash that you'll enjoy for years to come.


Comments ()