
8 Tips for Finding and Fixing the Leaks in Your Roof
Roof leaks can not only damage your roof but also compromise the structural integrity of your home. Here's a guide to finding and fixing leaks on your roof.
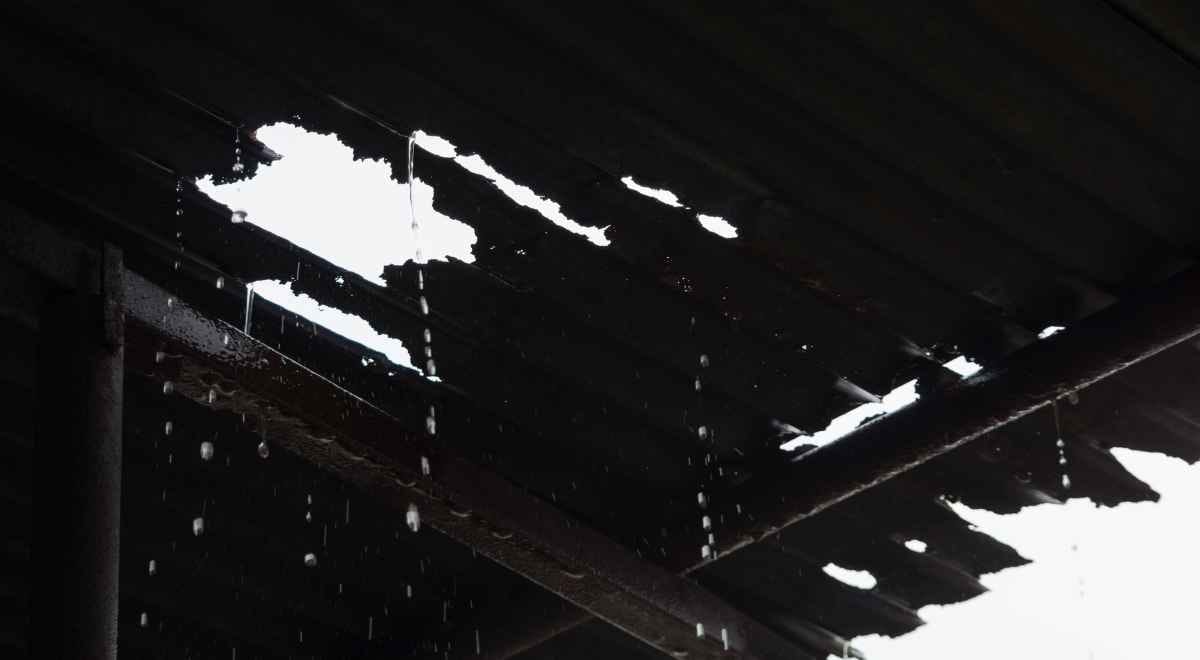
One of the most fearful things that can happen to any homeowner is having a leaking roof, which can cause great damage if it is not attended to in time. In order to maintain the value of your home, you need to be able to locate and fix leaks on the roof. For homeowners who want their homes protected and dry all through, here are eight important points that would help them detect and rectify roofing problems.
Finding Roof Leaks
- Look uphill to find roof leaks. To trace the source of water leaks, one should direct their gaze from a downhill position. Roof leaks are typically traced to a place higher on the roof than where they are seen in a house. Water can travel along rafters, beams, and other structures before finding its way onto your ceiling. Always start by inspecting the roof uphill of where you think the leak is. Check vents, chimneys, dormers, and skylights for any damages because they are some common culprits.
- Investigate the attic or crawlspace. By examining your attic or crawl space, you can unearth valuable insights regarding the source of leakage through the roof. Look out for water stains, mold, or wet insulation. Torchlight up under the roof and check any holes or openings. Be more careful with those areas around plumbing vents, chimneys, and skylights as they have a high chance of leaking.
- Look for the Causes of Your Roof Leak Reasons you may have a water leak on your roof include damaged shingles, cracked flashing, and clogged gutters. Look for missing, cracked, or curled shingles and check the flashing around chimneys, vents, and other things that stick out through the roof. Ensure that there are not any debris in your gutters or downspouts so that water doesn’t accumulate on your roof.
- Examine from a Distance Use binoculars to clearly see your roof from afar. This is where the roofing changes direction or when different materials meet which make these spots weaker.
- Use tricks to find difficult leaks To find a leak in the house by pouring water above and running a hose along the rooftop while someone watches inside for drips or signs of moisture could be an alternative way if it is hard to tell exactly where it is coming from. This is an effective way of determining the location of obscure leaks. Use a hose pipe section by section across the entire rooftop until you identify which part has an issue.
- Locating roof leaks When you suspect a leak, the best thing is to first measure and then by the use of a fixed point in the attic e.g. a chimney or a vent pipe. Besides, find the leak by putting this amount under the approximate position of the roof surface
- Check Flows on Plastic Barrier If you have a vapor retarder installed in your attic, check for water flow or moisture beneath it. Water stains or damp spots on the barrier can indicate the general area of the leak. Follow the path of water to find where it is coming from.
- Make Leaking Roofs with Fake Rain Create fake rain by spraying water on the roof can help identify leaks that only appear during heavy rain. This method is mainly useful for flat roofs, where water can pool and cause leaks. Make sure that someone is inside the attic or on the top floor to watch for any water leaks during the test.
Fixing roof leaks
- Stop leaks in walls and dormers Leaking of walls and slabs Leads to this phenomenon especially where walls and dormers meet the roof. Utilize a layer of caulk to block the air spaces and to mend the cracks between the dormer walls and the roof. Do not forget to inspect the siding to see if it is damaged, and if any is found, you have to fix or replace it. The only waterproofing that allows water to enter the walls is the application of appropriate techniques stemming from the experience of worker
- Repair damaged plumbing vent boots Plumbing vent boots may crack or get worse over time, leading to leaks around the vent pipe. Check the rubber boot for cracks and the metal flashing for signs of rust or damage. Replace the damaged boot or flash to prevent leaks in the future. Make sure that the new boot is properly sealed around the vent pipe.
- Redirect Leaking Water with a Bottle Funnel Use a plastic bottle funnel to direct water leaks away from areas that are important in an emergency. Slice off the bottom of a plastic bottle and fasten the neck to a hose or tubing. To collect the water and direct it to a secure drainage area, place the funnel beneath the leak. Until a more permanent repair is completed, this problem can help reduce damage.
- Control Leaking at Roof Joints Leaks are common at roof joints, where two portions of the roof meet. To seal the cracks and gaps in these areas, use roof cement. Before caulking with roof cement, cover more extensive gaps with a layer of roofing tape. This can lessen the chance of water seeping into the joints and starting leaks.
- Use tricks to find difficult leaks. The first step to take is simulating rainfall by running a hose on the roof while someone watches the roof for drips or signs of moisture in the house. This method can help to pinpoint exactly where the roof is leaking that might be hard to find. The diary of a workman reflected. The hose should be carried out one sector at a time, aiming at different parts to determine the problem area.
- Patch Leaks Around Brick Chimneys Flashing and mortar joints are the sites where leaks usually happen close to the roof, and they occur mainly due to misuse. Look over it for signs of rust, inspect the brick chimney for flashing and mortar joints, and replace any cracked or rusted ones. To fill out the joints inside the mortar surface joints, remove the old one and put up with the new one. Place a waterproof coating both on the flashing and on the joints of the mortar to hold back the water that would seep.
- Use a tarp or plastic sheet to cover the area. If you are unable to fix a leak right away, you should put a tarp or plastic cover on the area that is damaged. Nail the tarp or cover it with roofing cement. Make sure that the extension is made well beyond the leak. This is only temporary and can help retain the rains off the property until a better solution can be made.
- Replace the damaged step flashing. Step flashing, used where the roof meets a wall or chimney, can become damaged over time. Check the flashing for rust, cracks, or missing pieces. Replace any worn out, and damaged flashing, ensure the properly overlapping metal strips be properly affixed to the roof and walls to divert the water.
By following these tips, you can distinguish the places where water penetrates through your roof, thereby securing your house from water destruction. In cases of in-depth repairs or being inexperienced in roofing, professional roofing contractors can be the best solution. Companies like roofing contractor Pickering and Pickering Roof Repair Service may offer professional help and ensure that your roof is leak-free and properly maintained. To ensure that your roof remains in good shape for a longer time and that its structure doesn’t weaken regular checks, inspections, and repairs are indispensable.

Comments ()